Telescopic Bollards Installation
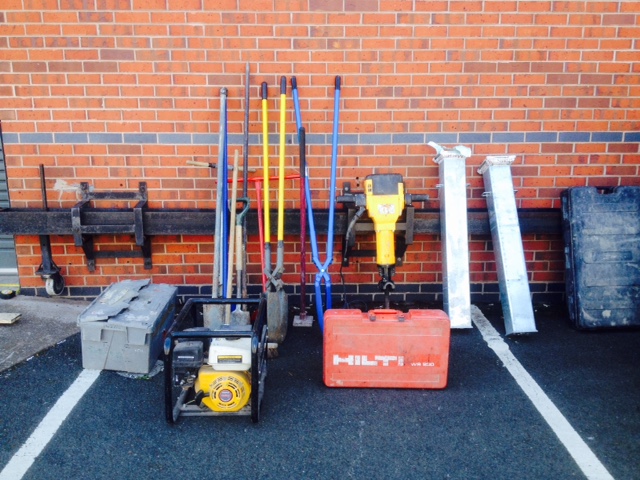
The Tools For The JobCAT Scanner, Mobile Power Generator, Large Grinder with Diamond Cutting Blade, Small Grinder with Metal Cutting Blade, Heavy Duty Road Breaker, Crossover Spades, Rabbiting Spades, General Spades, Shovels, Manual Augers, Heavy Duty Steel Breaker Bar, Tampers, Hammers, Chisels, Concrete Float Tools, Buckets, Rubble Bags, Water Bottles, Lifting Equipment, Broom, Dustpan & Brush, Large Van, Proper Blokes.
PPE Equipment
Hi-Vis Vests or Jackets, Safety Boots, Anti-Vibration Gloves, Builders Gloves, Impact Goggles, Respiratory Masks, Ear Defenders.
Installation Materials
Clean 20mm Soak Away Gravel, Concrete or Postcrete, Surface Topping.
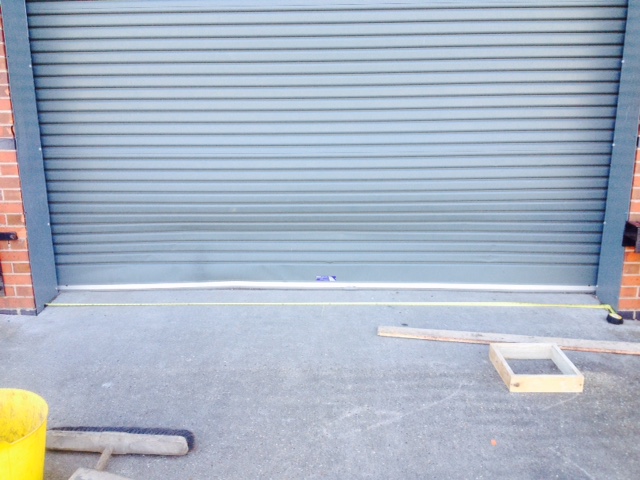
The Tools For Positioning The Bollards
Tape Measure, Wooden Square (400mm x 400mm), Long Piece of Wood and Marking Wax.
NB. We Recommend Distances between Bollards at 1.2 Metre to 1.4 Metre Maximum.
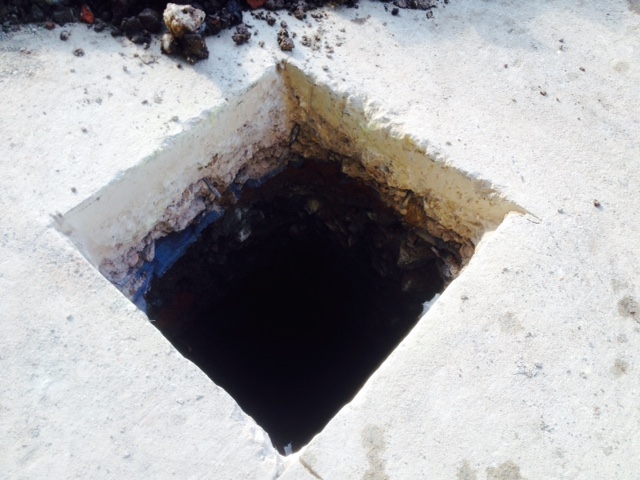
The Hole
Surface Cut Out with a Diamond Blade Grinder and Broken Out with a Heavy Duty Road Breaker, Spoil Removed with Spades, Augers, Breaker Bars and Grunt!!
This Particular Surface was Deep Flint Concrete with Reinforcing Rebars.
We Recommend a 400mm x 400mm Square Surface Cut Out and an Additional Depth of 300mm Longer than the Complete Bollard for the Drainage.
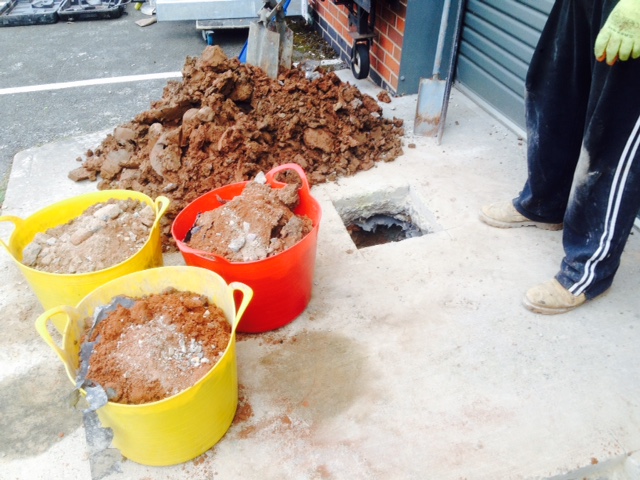
The Hole Spoil with BIG Mike's Legs, Feet and Hand
The Spoil is from ONE Hole! Lots of Buckets and Rubble Bags Required.
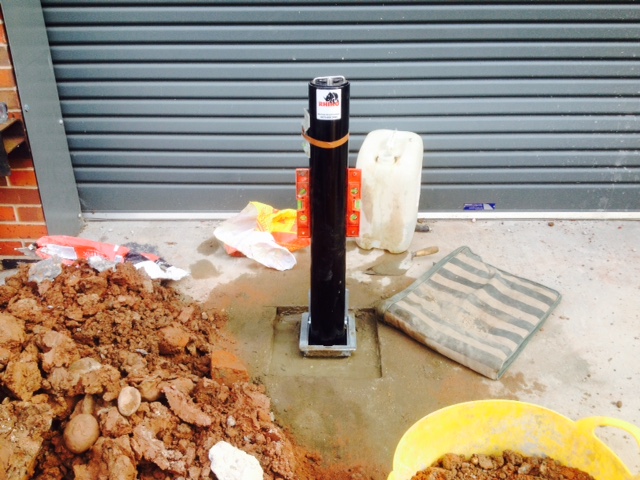
Positioning The Bollard
Making sure the Bollard is at the Correct Height, Square and Level before Backfilling with Clean Soak Away 20mm Gravel and Topping with Concrete.

Final Position Check After Backfill
Full Check from Every Angle with Spirit Levels.
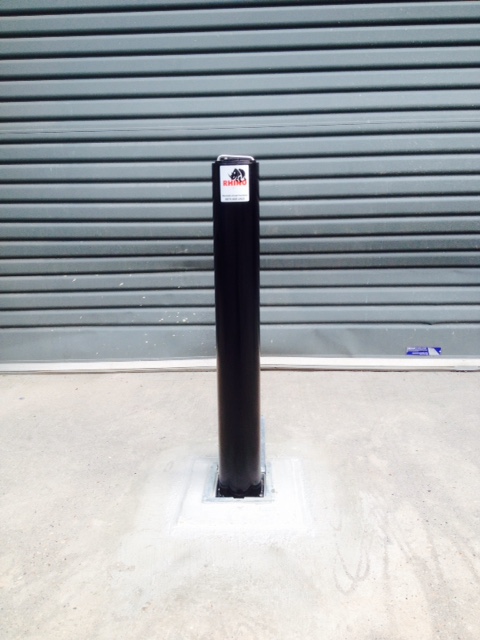
Final Surface Finish
Nice Neat Concrete Pad Around Base to Recommended Level (5mm above surface) to Minimise Water and Dirt Going Down into the Bollard.
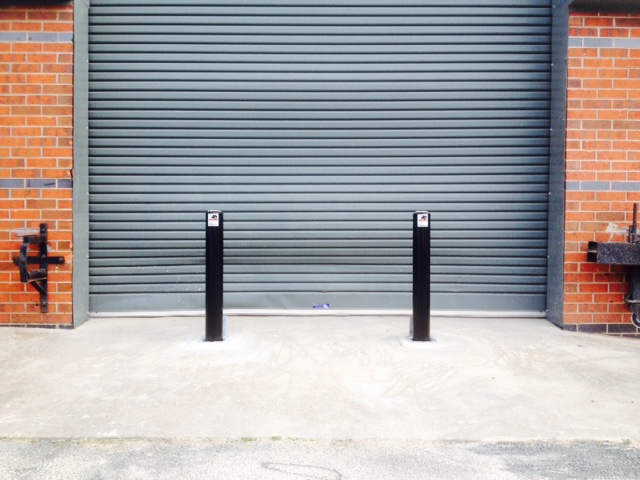
Yes, we are the Bollards...
Perfectly in Line and Level, Spaced at 1.2 Metres Apart, Bollards Cleaned and Waxed, Locks Silicone Lubricated, all Spoil Removed from Site and Area Cleaned.